Our Staircase Renovation Project - Removing 130 Years Of Paint

When I shared photographs of our staircase and landings a couple of weeks ago, and outlined our plans to strip and oil the wood, Antonia very sensibly asked in the comments whether the paint on the stairs was lead.
Lightbulb moment – we had no idea, but fortunately had not yet begun sanding any of the painted areas so decided to buy a home test kit to check for lead before deciding how to proceed.
We prepared the tester and began holding it against a cross-section of the multiple paint layers for the required half a minute – it turned a brilliant scarlet red in about 0.2 seconds, so yeah, we have lead paint. Whoopee! So we did copious amounts of reading on the subject, contacted LIPSA (the UK’s Lead Paint Safety Association) to get advice, and agreed on a plan of action.
I'm sure I don't need to say this, but I'm going to say it anyway - the information below is NOT a tutorial on removing lead paint. It's just a description of our experience of using a paint removal product.
We’re using a product called Home Strip, an amazing non-toxic water-based paint and varnish stripper designed to safely remove lead paint (and other paints, of course). We also have a full armoury of dust masks, scrapers (we’re using both wallpaper scrapers that we sharpen daily with our awesome grinder, plus razorblade scrapers), clingfilm (the kind that comes in one of those plastic dispenser thingies to make it easier to cut), plastic bags, kitchen roll, disposable gloves, baby wipes, stainless steel wool, kitchen scouring pads, a vacuum with HEPA filters, special DIY clothes that get washed in the machine by themselves, soap, and water. Lots and lots of water to keep everything nice and damp and reduce the possibility of lead dust or chippings flying into the air.

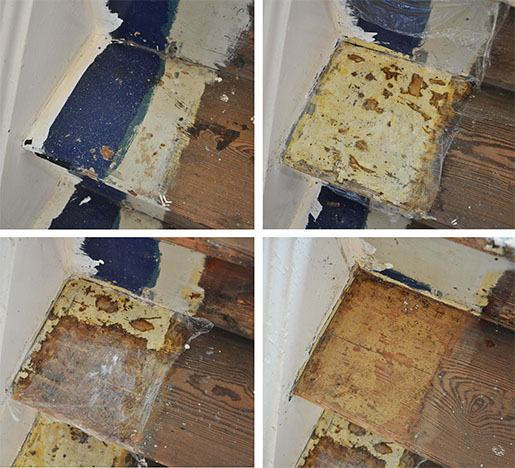
Home Strip at work on our staircase
Home Strip really is a magic product – recommended both by Google and Melanie (whose hilarious renovation blog, including her paraphrased conversations with an amusing range of eccentric contractors, is one of my must-reads). Home Strip doesn’t smell of anything at all, but it somehow chews through at least five layers of paint at a time. We appear to have eight different paint colours on our stairs – some lead, some modern – so assuming at least 2 coats of each, and likely more for some of the colours, we’re dealing with 16-20 layers, the oldest of which was painted on around 130 years ago. Yikes!
We’ve found that we usually need two or three applications of Home Strip to get down to the wood. We slap the stuff on pretty thickly – about 3mm to create an even, opaque layer seems to work for us – and then poultice with clingflim, leave for about 24 hours, soak in water if the product has gone dry, and then carefully scrape. And carefully scrape. And carefully scrape some more. The modern latex paint tends to flakes off like fish scales – but the lead paint peels off in dense, tight little rolls, like white chocolate curls. We find the sharp scrapers are good for removing the top layers – but once we get close to the wood, the sharp scrapers cut into the wood too much so something blunter is easier to control.

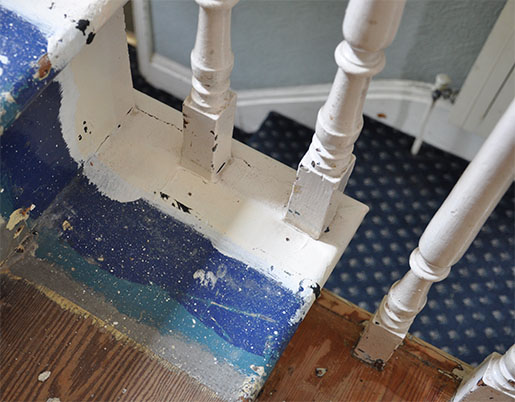
Our spindles before...
We’ve also learned to be guided by the Home Strip product – if the paint comes off easily, then it’s ready. If the paint seems resistant – we just apply more product, come back in a few hours (24 works for us, but this would vary depending on number of layers, type of paint, temperature in the house etc), and the paint should come off smoothly in long strips. Sometimes it can be frustrating when we’ve got everything off apart from a few chunks here and there, but rather than trying to force the paint off we’ve found it’s far better just to let the product do the hard work – especially as we’re dealing with lead paint and need to minimise dust and chippings flying everywhere, which would inevitably happen if we started furiously scraping away at dry paint that the product hasn’t reacted with yet.
When we’re down to the last couple of layers, we find the stainless steel wool often works well to dissolve the remaining paint and to remove any last particles engrained in the wood (this is recommended by the manufacturer). Sometimes the scraper works better though, so we just keep swapping between the various scrapers and steel wool to find an equation that works (we have harder wood on the stairs than the landings, for example, and have learned that we need slightly different techniques for each).
It's a huge amount of slow, painstaking work - especially since all we're doing is just getting the stairs into a suitable condition for renovation, and we still have hours and hours of power and manual sanding ahead of us once we've finally got all the paint off. It's satisfying, though, because we know that every layer that gets scraped off is gone for good and will never have to be re-done - unlike painting walls and woodwork, which you know will most likely need doing again in a couple of years.

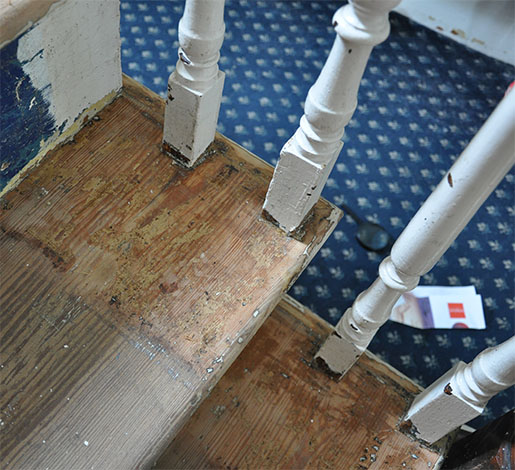
...and our spindles after
Well, that was an inspiring post, wasn’t it :-) I do find it hugely helpful when I come across information shared by fellow UK renovators on the products and techniques they’re using to restore their houses, however, so wanted to pay it forward. Please feel free to ask any questions in the comments – and I love meeting new UK DIY/reno bloggers, so if this is you, then please say hi!
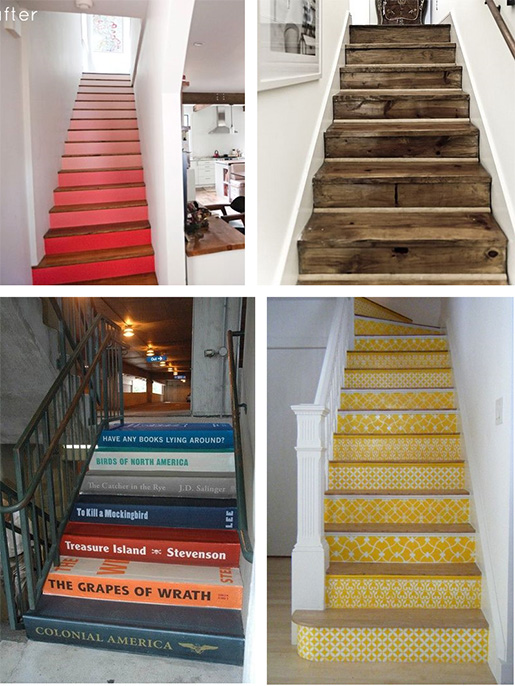
If this was all too much for you, however, hopefully I can redeem myself with some pretty Pinterest pictures of staircases :-)

Gradient via D*S, natural wood via Houzz, books by The Bounce Agency via Toxel, yellow stencilled stairs by Royal Design Studio at Peacock Pavilions in Marrakesh.
We like the idea of painting a gradient on the third flight of staircases – which will also, of course, have the bonus effect of meaning we don’t have to mess around removing lead paint from the risers as well as the treads…